Easy Ice Cream Cone Recipe You Can Make at Home
Table of Contents
Making homemade ice cream cones is a fun and rewarding process. You can do it in the comfort of your own kitchen. With a simple ice cream cone recipe, you can create delicious treats. These are perfect for hot summer days or any time you crave something sweet.
You don’t need to be a skilled baker to make ice cream cones at home. Our easy-to-follow guide will walk you through the process. It will give you the confidence to try making your own cones.
Key Takeaways
- Learn how to make a simple ice cream cone recipe at home.
- Discover the ingredients needed for homemade ice cream cones.
- Understand the step-by-step process of creating delicious cones.
- Get tips on customizing your cones with your favorite flavors.
- Enjoy making and eating your very own homemade ice cream cones.
The Joy of Homemade Ice Cream Cones
Biting into a crispy, homemade ice cream cone is a joy like no other. It makes your favorite ice cream even better. Making homemade waffle cones is more than just the end result. It’s about the fun of making them and sharing with others.
What Makes Homemade Cones Special
Homemade cones are special because they’re made with love. You can pick the ingredients, flavors, and textures. This makes each cone unique and special.
Whether for a family event or a treat, homemade cones show your love. They make any occasion more special.
Overview of What You’ll Learn
In this section, we focus on the joy of making your own ice cream cones. You’ll see why homemade cones are better than store-bought ones. We’ll also cover recipes and techniques.
| Topic | Description |
|---|---|
| Homemade Cone Benefits | Learn why making your own cones is better than buying them. |
| Recipe Preview | Get a sneak peek into the ice cream cone recipe we’ll be sharing. |
| Techniques and Tips | Discover various techniques to make perfect cones every time. |
By the end of this article, you’ll know how to make tasty homemade waffle cones. Enjoy them with your favorite ice cream.
History of the Ice Cream Cone
The story of the ice cream cone is both fascinating and full of innovation. As you enjoy your homemade waffle cones, you’re part of a long tradition. This tradition goes back to the early 20th century.
Origin Stories and Invention
The ice cream cone’s story starts at the 1904 World’s Fair in St. Louis, Missouri. A legend says an ice cream vendor needed dishes and turned to Ernest Hamwi, a waffle vendor. Hamwi made waffles into cones, and the ice cream cone was born.
This moment started a new way for people to enjoy ice cream.
Evolution Through the Years
Over time, the ice cream cone has changed a lot. New materials and flavors have been added. Today, making homemade waffle cones is a favorite activity for many.
You can make waffle cones at home. This lets you choose your own flavors and textures. It’s a way to keep a tradition alive that has brought joy to many for generations.
Why Make Your Own Ice Cream Cones?
Homemade ice cream cones are special because you can choose exactly what goes into them. You can pick the ingredients, flavors, and textures. This way, you can make sure they’re just right for your favorite ice cream.
Benefits of Homemade vs. Store-Bought
There are many good reasons to make your own ice cream cones. Here are some key points:
- Freshness: Homemade cones are always fresh. They have a crispy texture and taste great.
- Customization: You can pick the ingredients and flavors based on what you like. This makes sure they match your ice cream perfectly.
- Cost-effective: Making your own cones can save money. It’s cheaper than buying them, which is good if you make ice cream often.
Customization Possibilities
One of the best things about making your own ice cream cones is the chance to get creative. You can add different flavors like cinnamon or cocoa powder to the batter. You can even make cones without a waffle maker, using a skillet or oven. This lets you try out new textures and tastes.
Essential Ingredients for Perfect Ice Cream Cone Recipe
The secret to a perfect ice cream cone recipe is in the quality and mix of its basic ingredients. Making homemade waffle cones that are crispy and flavorful takes more than just a few ingredients. It requires choosing each component carefully to get the right taste and texture.
Basic Ingredients List
To begin, you’ll need a few simple ingredients for your ice cream cone recipe:
- Flour: Provides structure to your cones.
- Sugar: Adds sweetness and helps in browning.
- Eggs: Acts as a binder and enriches the cones.
- Milk or Cream: Adds moisture and tenderness.
- Butter: Enhances flavor and texture.
- Flavorings (optional): Such as vanilla or cinnamon to add a unique twist.
Quality Considerations
Quality is key when picking ingredients. Using high-quality flour that’s fresh and good for baking makes better cones. Also, choosing real butter instead of margarine boosts the flavor. Think about the sugar type too; finer sugars dissolve better, making the batter smoother.
Ingredient Substitutions
Sometimes, you might need to swap ingredients due to dietary needs or what’s available. For example, almond milk or other non-dairy milks work if you’re avoiding dairy. If you’re gluten-free, try a gluten-free flour blend instead of regular flour. But remember, swapping ingredients can change how the cone tastes and feels, so you might need to try a few things.
Equipment You’ll Need
To start making your own ice cream cones, you’ll need some tools. Making homemade ice cream cones is fun and rewarding. The right equipment is key to getting the perfect cone.
Essential Tools
The most important tool for making waffle cones is a waffle maker or a cone maker. If you don’t have one, consider getting a good quality waffle iron. You’ll also need a mixing bowl, a whisk, and a measuring cup for the batter.
“A good waffle maker is like a good friend – it helps you make great waffle cones,” says a renowned chef. A non-stick surface is important to prevent cones from sticking and make them easier to shape.
Alternative Equipment Options
If you don’t have a waffle maker, there are other options. You can use a skillet or a panini press to make waffle cones. The result might be a bit different. You can also bake the cones in an oven, which requires a different technique but can work well.
Trying out different equipment will help you find what works best for you. Soon, you’ll be making delicious homemade ice cream cones like a pro.
Classic Homemade Waffle Cones Step-by-Step
With a simple recipe and the right technique, you can make delicious homemade waffle cones. This guide will show you how to prepare the batter, bake the cones, and shape them perfectly.
Preparing the Batter
To begin, mix the batter for your waffle cones. You’ll need flour, sugar, eggs, and other ingredients.
Mixing Techniques
Mixing the batter well is key to avoid lumps. Use a whisk or blender to mix all ingredients together.
Consistency Tips
The batter should be smooth. It should not be too thick or too thin. Adjust the consistency as needed.
Baking the Cones
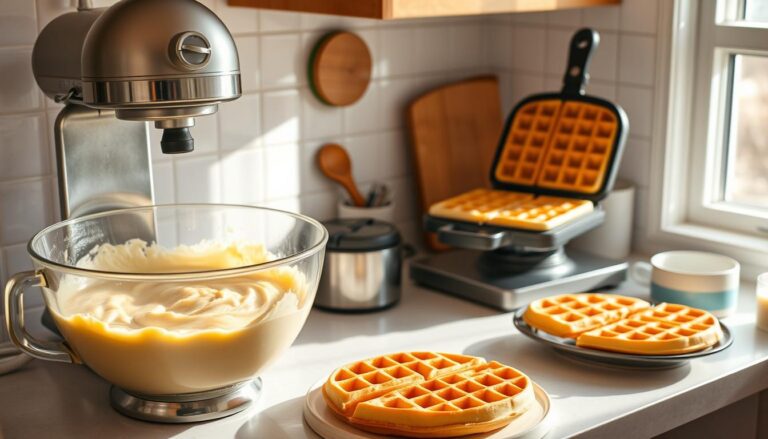
Now, it’s time to bake your cones. Use a waffle iron or similar device to cook the batter into crispy waffles.

Shaping Techniques
Shape the waffles into cones while they’re warm and pliable. This requires some skill, but you’ll get better with practice.
| Step | Description | Tips |
|---|---|---|
| 1. Prepare Batter | Mix ingredients thoroughly | Use a whisk or blender |
| 2. Bake Cones | Cook batter into waffles | Use a waffle iron |
| 3. Shape Cones | Form waffles into cones | Shape while they’re warm |
How to Make Waffle Cones Without a Waffle Maker
You don’t need a waffle maker to make crispy, homemade waffle cones. You can use kitchen tools you probably have.
Using a Skillet Method
Use a skillet to make waffle cones. Heat a non-stick skillet over medium heat. Pour in your batter and tilt to spread it evenly.
Cook until the edges curl. Roll the cone shape and let it cool.
Oven-Baked Alternative
Try baking your cones in the oven. Spread the batter thinly on a baking sheet. Bake until crispy.
Shape the cones while they’re warm.
Using a Panini Press or Sandwich Maker
A panini press or sandwich maker works too. Place the batter between the plates. Cook until crispy for a uniform cone.
| Method | Equipment Needed | Result |
|---|---|---|
| Skillet Method | Non-stick Skillet | Crispy, manually shaped cones |
| Oven-Baked | Baking Sheet, Oven | Thin, crispy cones |
| Panini Press | Panini Press or Sandwich Maker | Uniform, crispy cones |
Sugar Cone Variation Recipe
Sugar cones offer a crunchy texture and sweet taste, making them a great choice for your homemade ice cream cones. They provide a nice contrast to the creamy ice cream.
Ingredient Adjustments
To make sugar cones, you need to tweak the ingredients a bit. You’ll add more sugar and possibly use a different flour for crunchiness.
Key Ingredients:
- Granulated sugar
- All-purpose flour or a mix of all-purpose and cornstarch for extra crispiness
- Butter or oil for moisture
- Flavorings like vanilla or almond extract (optional)
Preparation Differences
Making sugar cones is different from waffle cones in how they’re cooked. They’re baked at a higher temperature for a shorter time to get that crispiness.
Cooking Tips:
- Preheat your oven to the right temperature (around 375°F or 190°C).
- Use a cookie sheet or a specialized cone baking sheet.
- Shape the cones immediately after baking while they are warm and pliable.
Texture and Flavor Profile
Sugar cones are crunchy and firm but also have a delicate snap. Their flavor is sweeter, with a caramelized sugar taste that boosts the ice cream experience.
| Cone Type | Texture | Flavor Profile |
|---|---|---|
| Waffle Cones | Soft, slightly crunchy | Mild, waffle-like |
| Sugar Cones | Crunchy, firm | Sweet, caramelized sugar |
By making sugar cones at home, you can enjoy a delicious and crunchy treat with your favorite ice cream. Try different ingredients and baking methods to create your ideal sugar cone recipe.
Troubleshooting Common Problems
Making ice cream cones at home can sometimes come with a few hitches. But, these problems are simple to fix with a little bit of knowledge.
Cones Breaking or Cracking
One common issue is when your cones break or crack. This often happens if you shape them too roughly when they’re warm or if the batter is too thick. To prevent this, shape your cones carefully but firmly. Also, make sure your batter is just right.
Tip: If your cones crack, fill them with ice cream fast to lessen the damage. Or, use them for crushed cone toppings.
Texture Issues
The texture of your cones can be influenced by baking time and temperature. If they’re too chewy, they might not be baked enough. On the other hand, if they’re too crispy, they’ve been baked too long. Adjusting your baking time and checking your oven’s temperature can help.
| Issue | Cause | Solution |
|---|---|---|
| Too Chewy | Underbaked | Bake for a few more seconds |
| Too Crispy | Overbaked | Reduce baking time |
Shaping Difficulties
Shaping cones can be challenging, but it gets easier with practice. The trick is to work fast when the cone is warm and soft. If your cones harden too quickly, wrap them in a towel to keep them warm.
“The art of making perfect waffle cones lies in the details – from the batter’s consistency to the shaping technique.”

Decorating and Enhancing Your Homemade Ice Cream Cones
Now that you’ve learned to make homemade ice cream cones, it’s time to get creative. Decorating your homemade waffle cones makes them special and personal. It’s a fun way to add your own touch.
Chocolate is a great choice for decorating. Chocolate dipping techniques add a smooth, rich layer. Just melt the chocolate, dip the cone, and let it cool. You can add toppings before it hardens for extra flavor.
Chocolate Dipping Techniques
To dip in chocolate, you need good chocolate and patience. Here’s a simple guide:
- Melt the chocolate in a double boiler or in the microwave in 30-second increments, stirring between each heating.
- Dip the cone into the melted chocolate, or use a spoon to coat it evenly.
- Immediately sprinkle with your chosen toppings before the chocolate hardens.
Sprinkles and Toppings
Sprinkles and toppings can make your homemade ice cream cones look and taste better. You can choose from sprinkles, crushed nuts, and candy pieces. Here’s a comparison of popular toppings:
| Topping | Flavor Profile | Texture |
|---|---|---|
| Sprinkles | Sweet, colorful | Crunchy |
| Crushed Nuts | Nutty, rich | Crunchy |
| Candy Pieces | Sweet, fruity | Chewy |
Edible Decorations
For something more elaborate, try edible decorations like glitter, wafer paper designs, or handmade sugar decorations. They add a professional look to your homemade waffle cones.
With these decorating ideas, you can make your homemade ice cream cones unique and special. They’re sure to impress anyone.
Storing Your Homemade Waffle Cones
Keeping your homemade waffle cones fresh is important. Whether you’ve just made them or are saving them for later, knowing how to store them is key.
Short-Term Storage
For short-term storage, use an airtight container at room temperature. This is best if you’ll use them in a few days. Make sure the container is sealed well to keep moisture out.
Long-Term Storage Options
For longer storage, freeze your waffle cones. Put them on a baking sheet and freeze until they’re solid. Then, put them in a freezer-safe bag or container. This way, you can store them for up to 3 months. Just thaw them at room temperature when you’re ready to use them.
Refreshing Stale Cones
If your cones get stale, you can make them crispy again. Bake them in a preheated oven at 350°F (175°C) for a few minutes. Watch them closely to avoid burning. This trick can make them feel like new.
| Storage Method | Duration | Tips |
|---|---|---|
| Room Temperature | Up to 3 days | Use airtight container |
| Freezer | Up to 3 months | Freeze in single layer, then transfer to freezer-safe bag |
By using these storage tips, you can enjoy your homemade waffle cones for longer. Whether it’s short-term or long-term storage, keeping them fresh is important.
Conclusion
Now you know how to make tasty homemade waffle cones and ice cream cones. You can enjoy your favorite ice cream in a new way. The recipes and techniques are here to help you.
By making your own cones, you can pick the flavor and texture you like. You can make classic waffle cones or sweet sugar cones. This way, you can match your cones with your favorite ice cream.
With a little practice, you’ll be making amazing homemade ice cream cones. They’ll impress everyone. So, get creative and enjoy the fruits of your labor!
FAQ
What is the best way to make homemade waffle cones?
To make homemade waffle cones, start by mixing a batter. Then, cook it in a waffle iron or other equipment. Shape the cones while they’re warm. You can also tweak the recipe to suit your taste.
How do you make waffle cones without a waffle maker?
Without a waffle maker, use a skillet, oven, or a panini press. These methods let you make cones with what you likely have at home.
What are some common issues when making ice cream cones, and how can you troubleshoot them?
Issues like cones breaking or texture problems can happen. To fix these, make sure your batter is just right. Adjust cooking time and temperature. Handle the cones carefully when shaping.
How can you store homemade waffle cones to keep them fresh?
Store cones in an airtight container in a cool, dry place. For short-term, keep them at room temperature. Freeze for longer storage. To refresh stale cones, bake them briefly in the oven.
Can you customize homemade ice cream cones with different flavors and toppings?
Yes, making homemade cones lets you get creative. Try adding flavors to the batter or dipping in chocolate and sprinkles. It’s a fun way to experiment.
What are some tips for decorating homemade ice cream cones?
For decorating, use chocolate, sprinkles, and edible decorations. Try different toppings like nuts or coconut for texture and flavor.
How do you make homemade ice cream cones without them becoming too brittle or fragile?
To avoid brittleness, make sure your batter is right. Cook the cones until they’re lightly golden. Proper storage helps keep them soft.
